
Most people stall out on permanent outdoor lighting because the install looks complicated. It isn't. The Govee Permanent Outdoor Pro system is well-designed hardware, and if you pair it with a dedicated track like GeauxTrax, the whole job becomes a two-day weekend project: measure and mount on Saturday, snap in pucks and run power on Sunday. Here's every step, in order.
What you'll need before you start
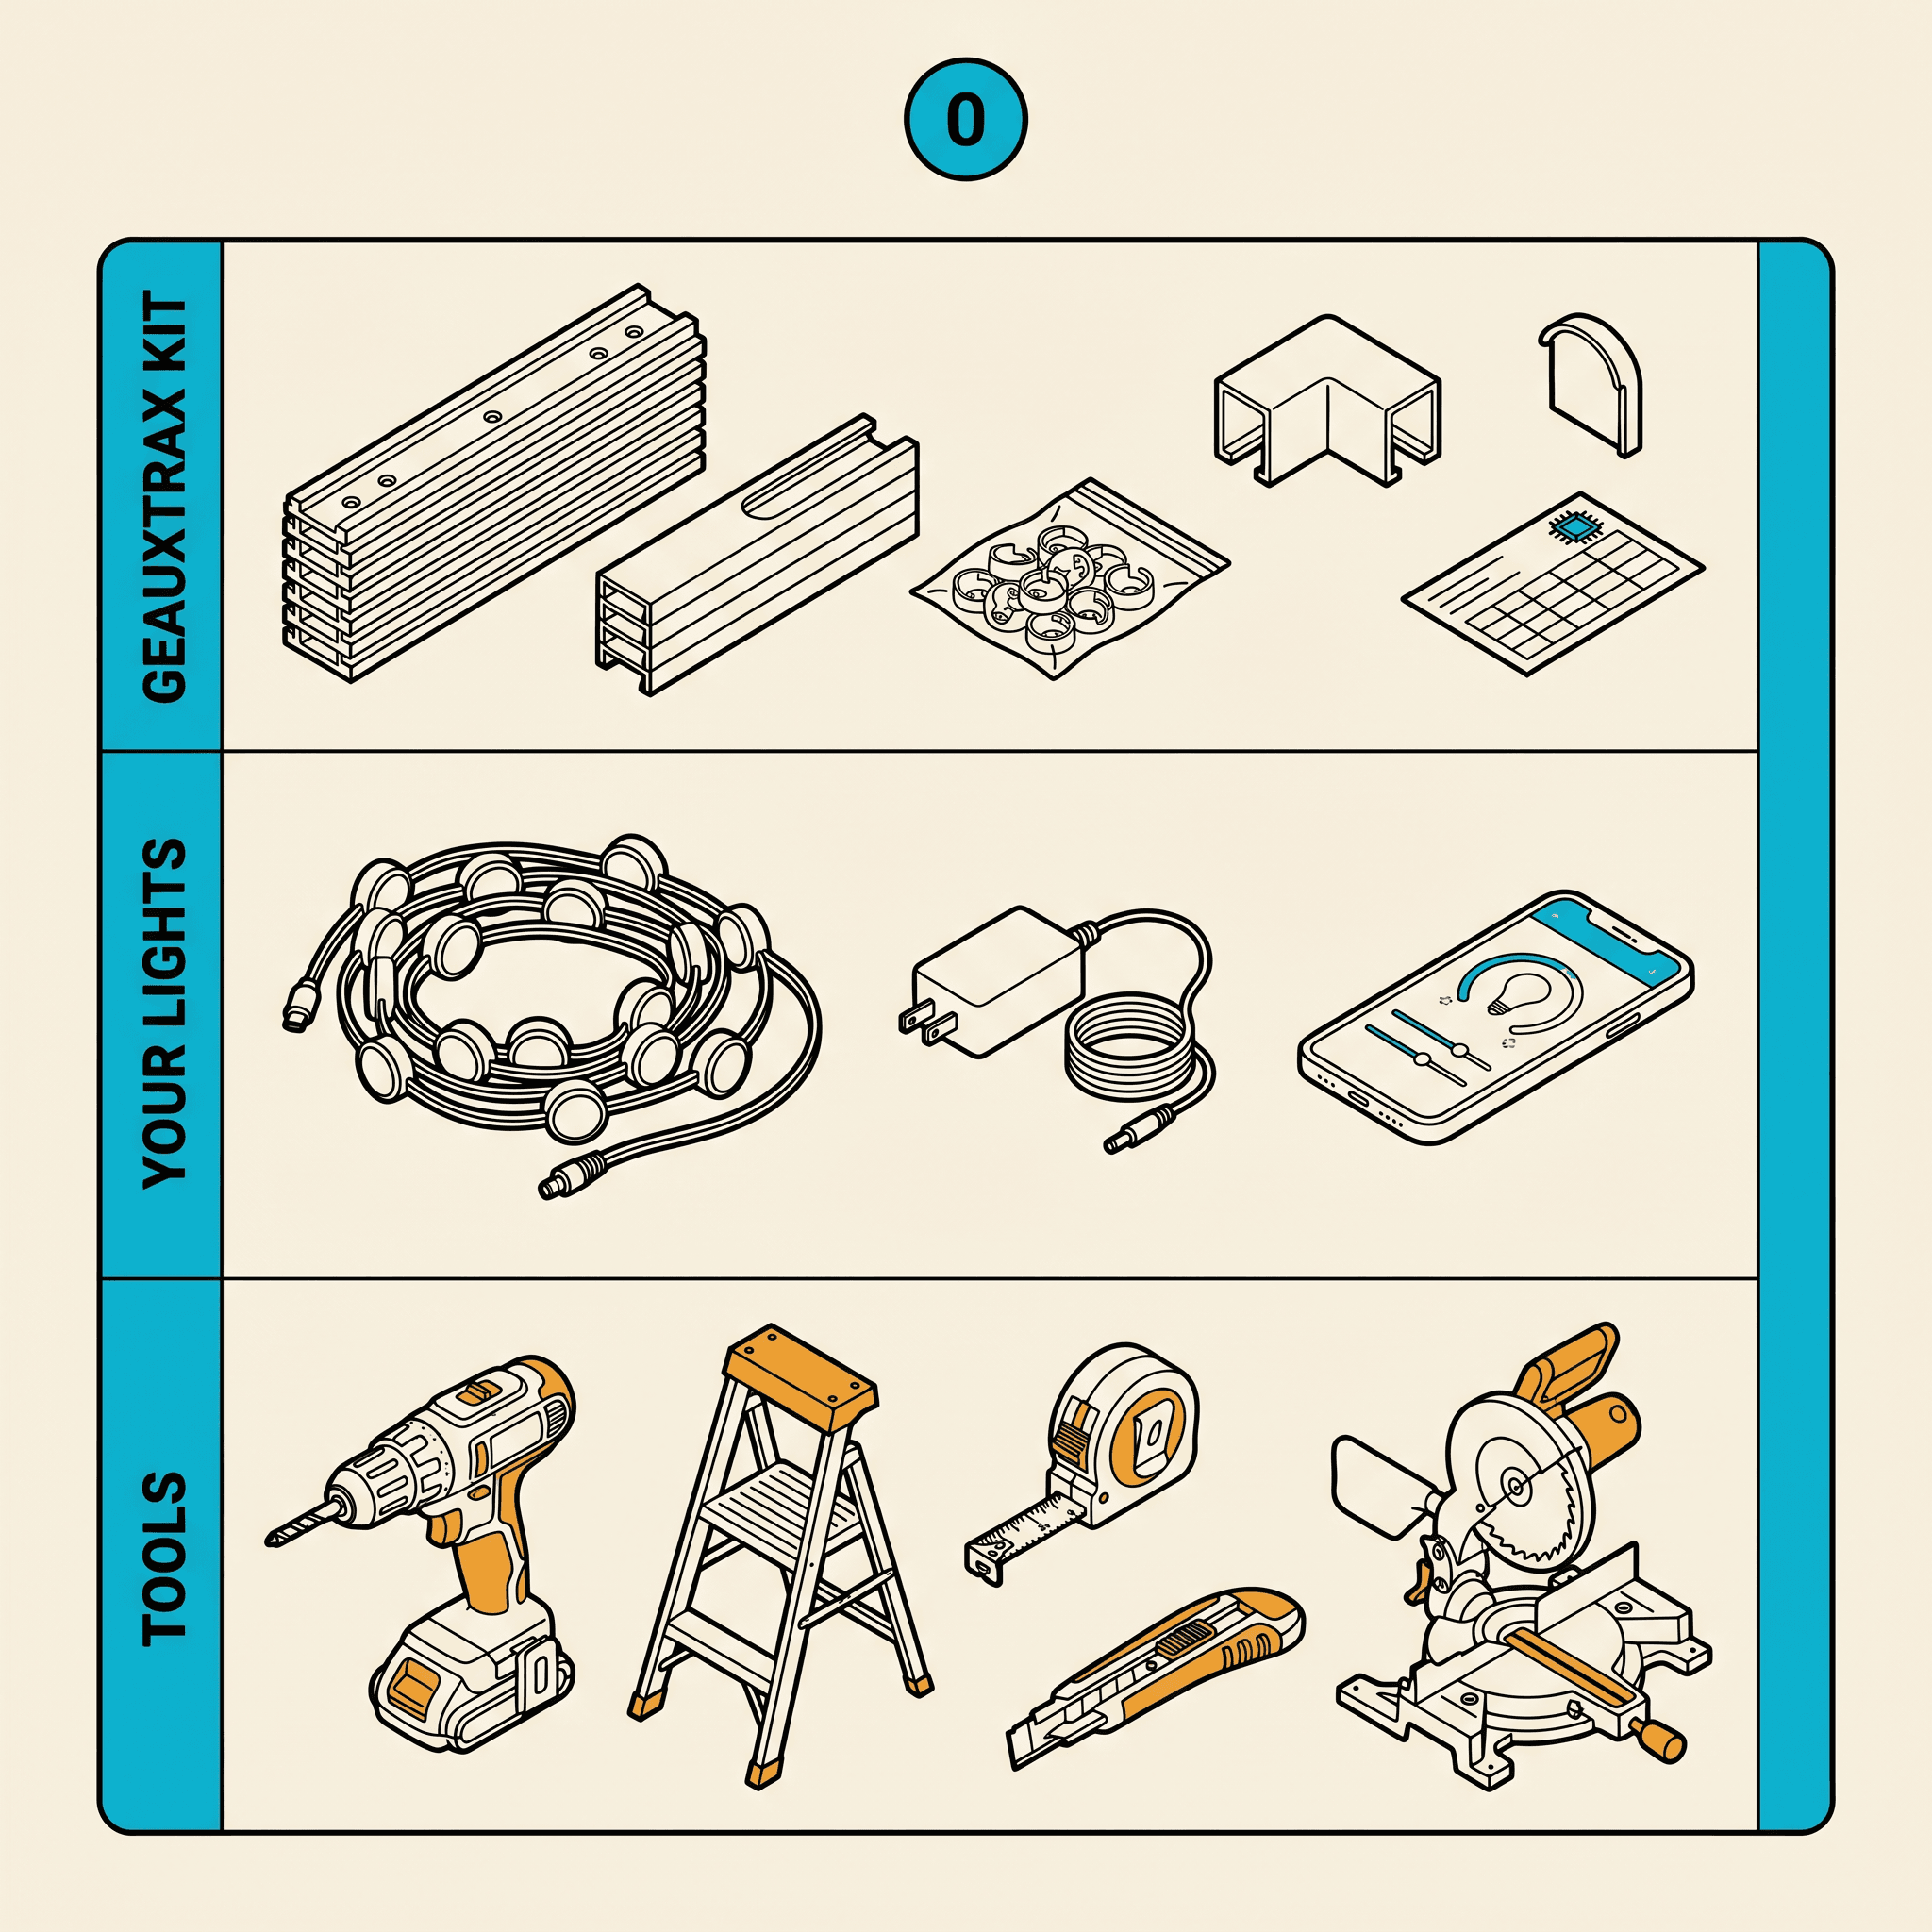
Gather these tools and materials before you climb a single rung of ladder. A mid-project trip to the hardware store is the fastest way to lose momentum.
Tools
- Cordless drill with #2 Phillips and #2 square (Robertson) bits
- 1/8" drill bit for pilot holes in wood soffit (skip on vinyl or aluminum)
- Self-drilling screws if you have a vinyl or aluminum soffit
- Miter saw or compound miter box — essential for clean corner cuts
- Tape measure (25 ft minimum)
- Chalk line or laser level
- Stepladder rated for your roofline height (6 ft minimum for single-story)
- Wire staple gun or cable clips
- Utility knife
- Pencil for marking the soffit
Materials
- From GeauxTrax: Screen Tight 1.5-inch base strips, 16-inch PETG covers with pre-cut puck windows, and finishing end caps.
- From Govee (sold separately): Govee Permanent Outdoor Pro lights sized for your linear footage, power supply, and controller. The Govee Home app is required to operate the lights.
- 1-1/4" exterior wood screws (#8 gauge works well in wood soffit)
- Self-drilling #8 screws if you have a vinyl or aluminum soffit
- Exterior-grade silicone sealant (clear) for around power entry points
- Outdoor-rated wire staples or cable management clips
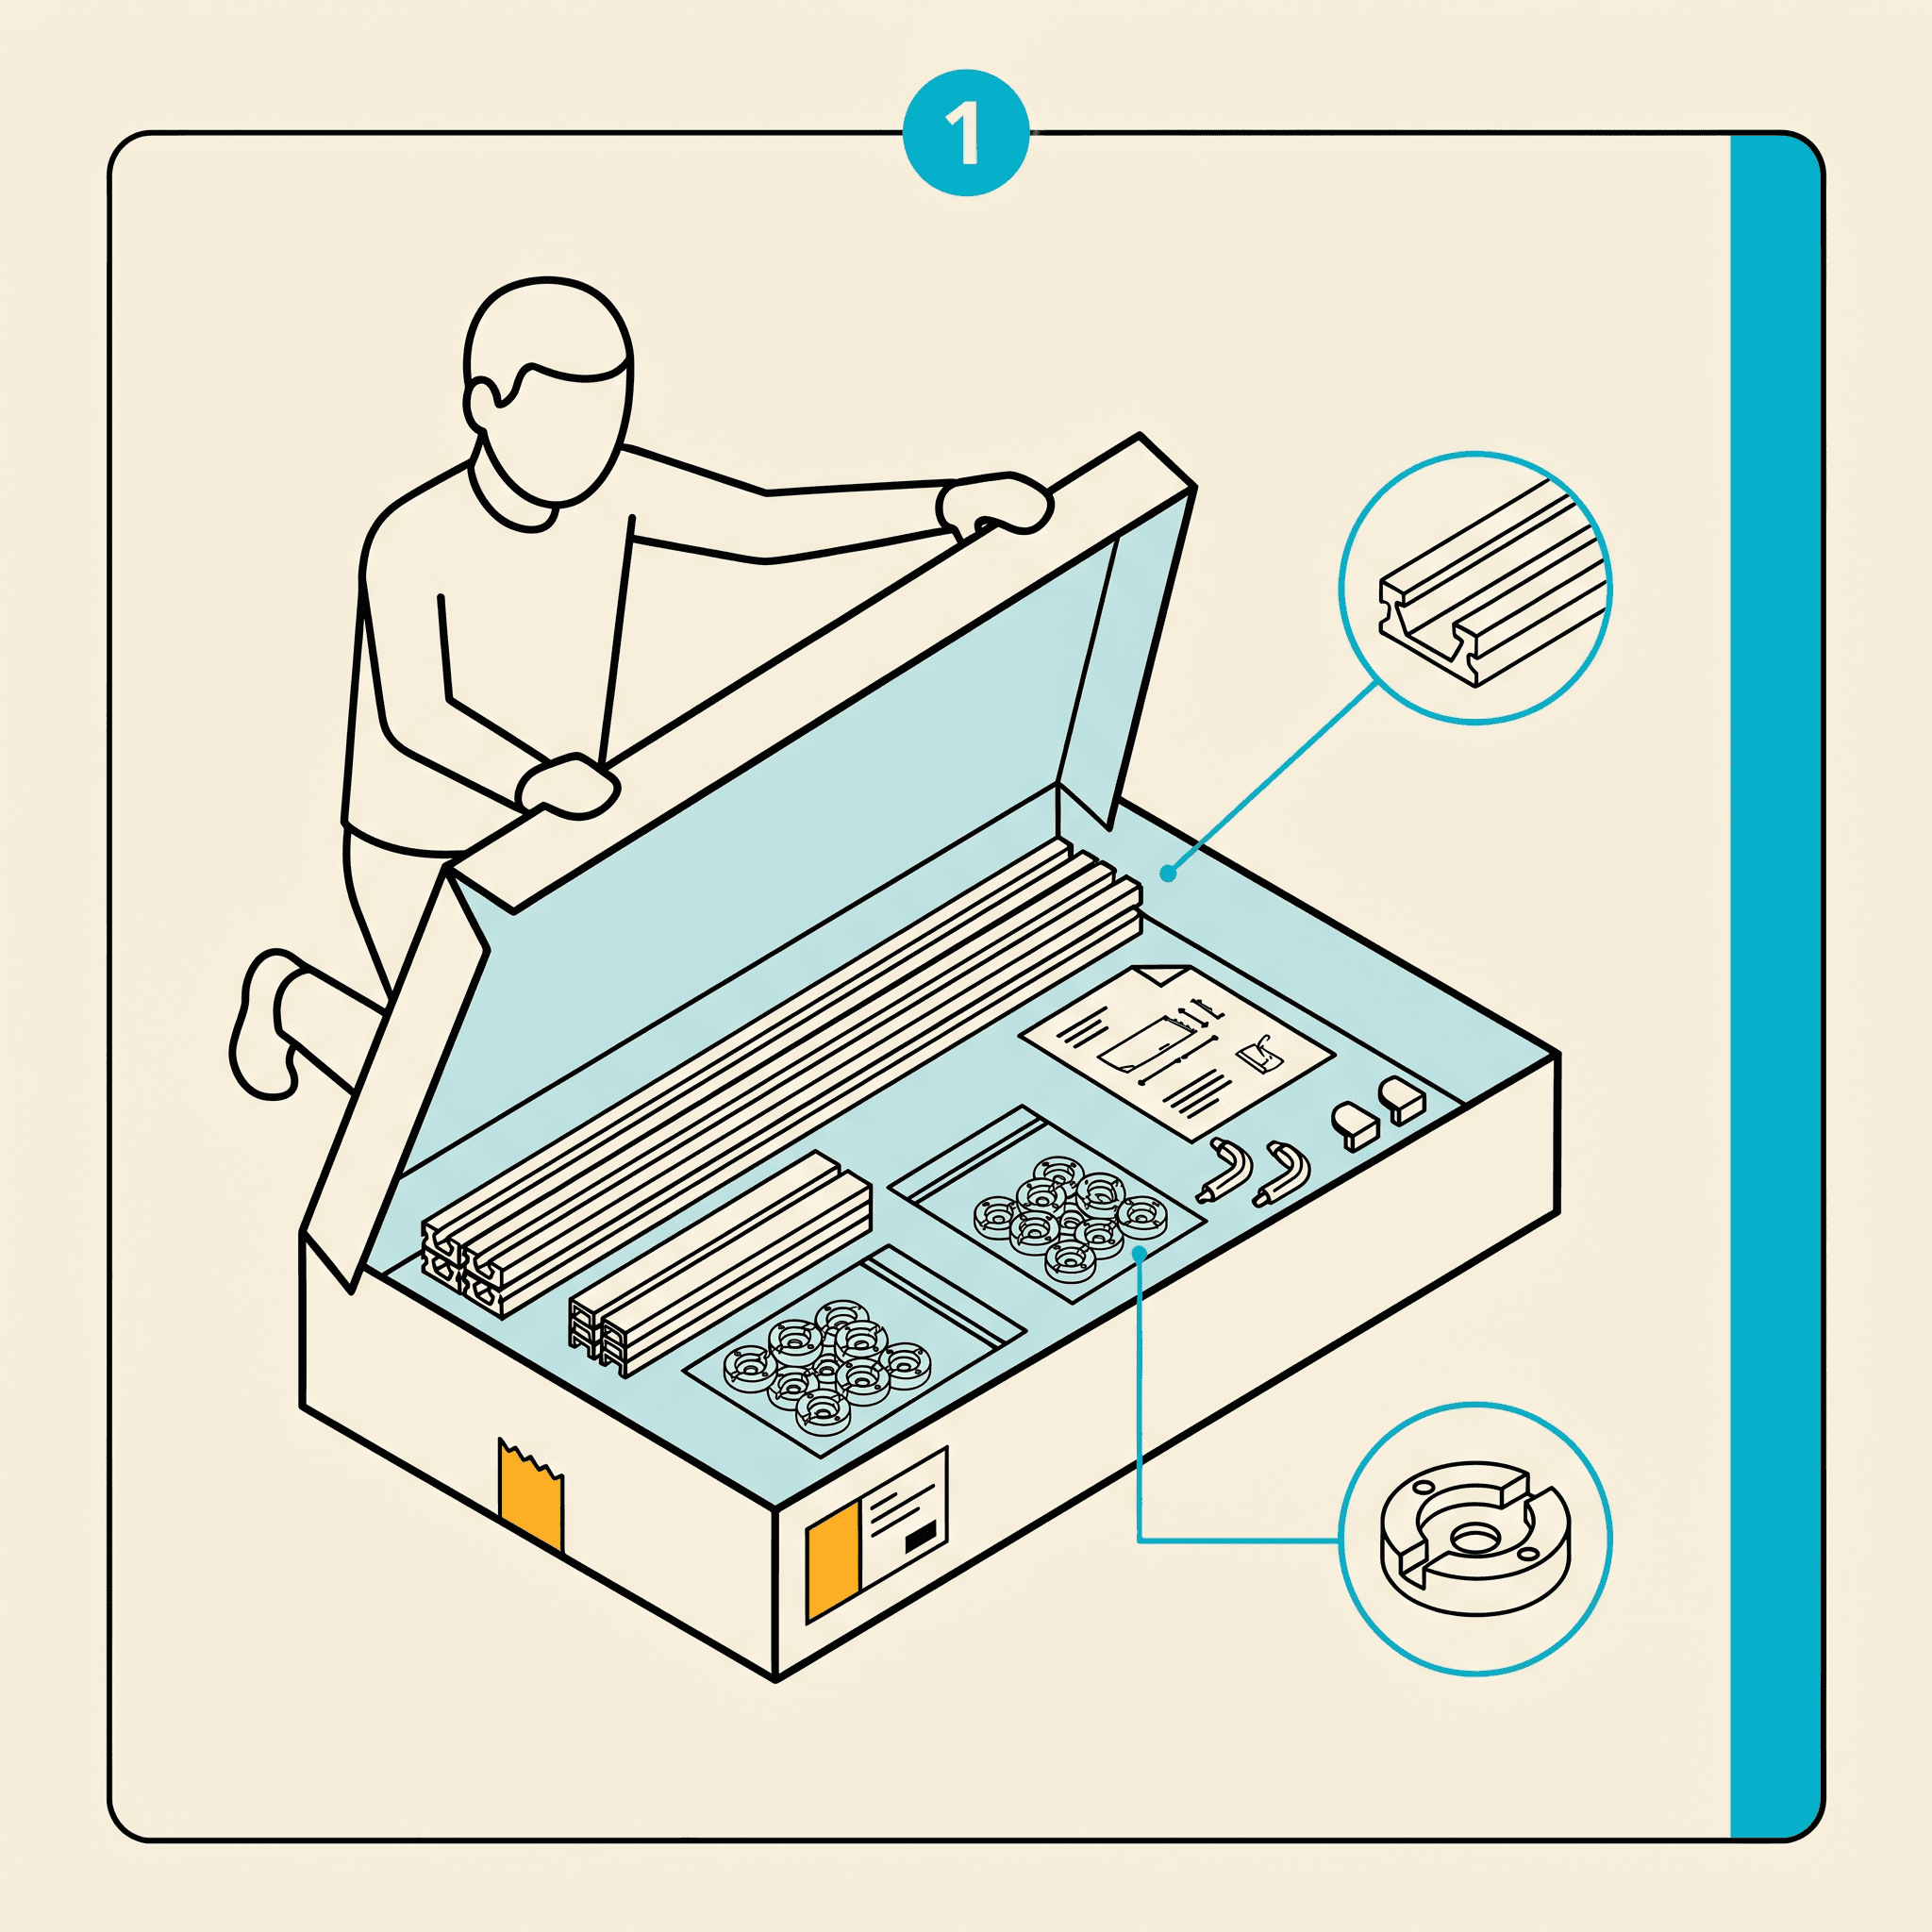
Step 1: Unbox and inventory
Open the GeauxTrax kit on a flat surface. Inside you'll find Screen Tight base strips, 16-inch PETG cover sections with pre-cut puck windows, end caps, and a printed spec card. Confirm everything matches the spec card before you start cutting. If anything is missing, email support@geauxtrax.com and we'll send it overnight.
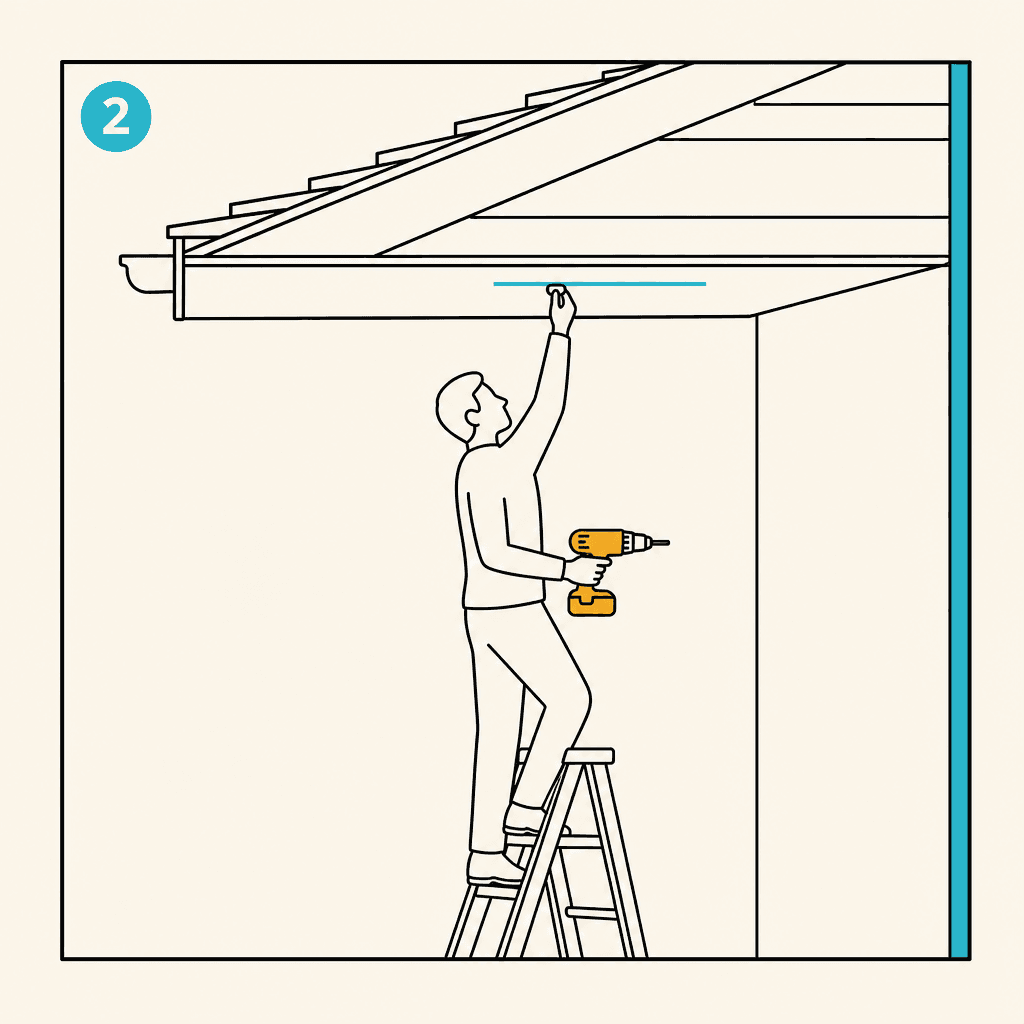
Step 2: Measure and mark the soffit
Walk every roofline you plan to light and measure in linear feet. Write down each run separately — front, left side, right side, back — because you'll order track by total linear footage but cut each run independently. Add 10% to your total for waste.
GeauxTrax mounts to your soffit — the horizontal underside of your roof overhang, between the outer edge of the roof and your exterior wall. Snap a chalk line along the soffit a couple of inches back from the outer edge, running parallel to your exterior wall. This line is your reference for every screw you drive. If you don't have a soffit (some homes with a short overhang mount directly to the trim board at the roofline instead), email us a photo and we'll confirm the right approach for your home.
Pro tip: Photograph every run with your phone before you climb down. Having a reference image when you're cutting track at your miter saw prevents expensive mistakes.
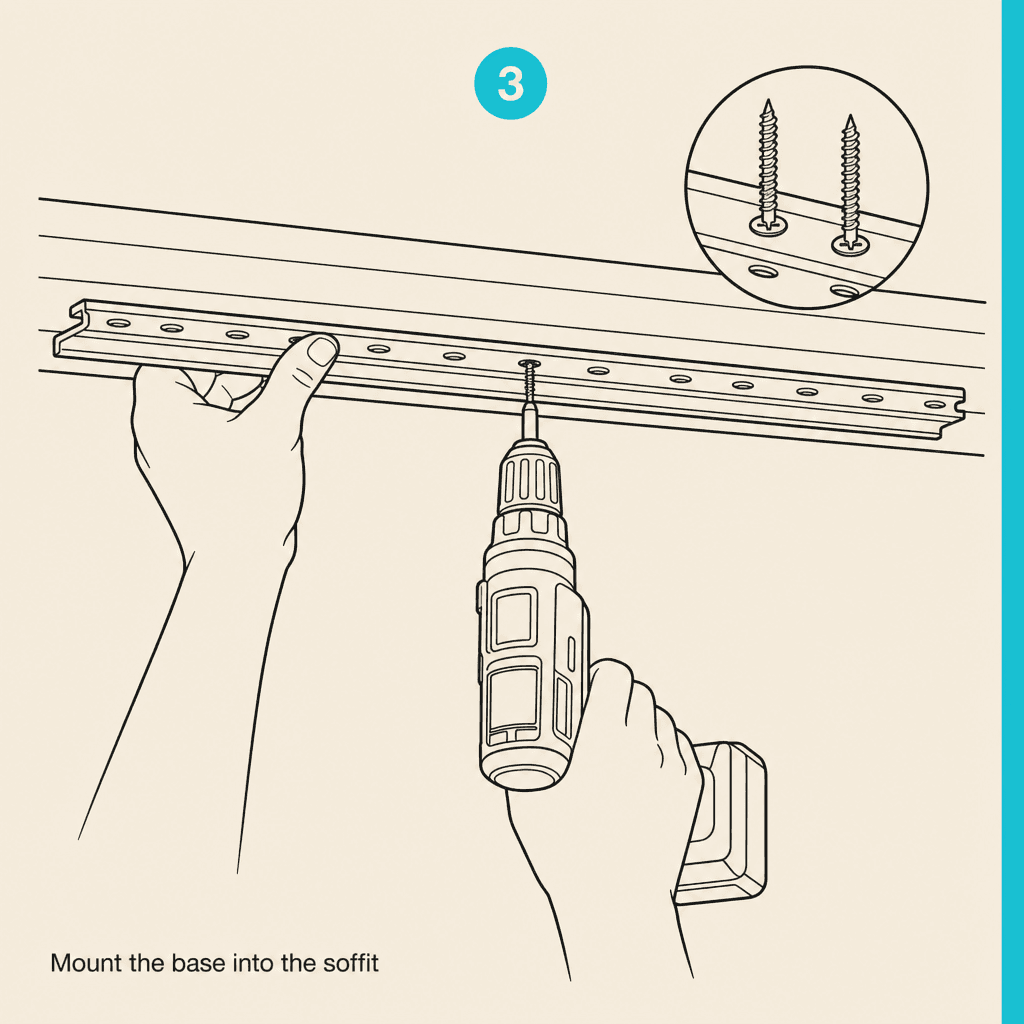
Step 3: Mount the Screen Tight base
This is the step that sets everything else up. Get it right and the rest of the install is satisfying. Rush it and you'll be re-drilling.
The GeauxTrax base is a low-profile Screen Tight 1.5-inch porch-screening base strip with a centered raised flute and pre-punched screw slots running its length. Hold a section flat against the soffit along your chalk line and run screws straight up through the pre-punched slots. On a wood soffit, exterior #8 screws work directly; on a hardwood soffit always pre-drill with a 1/8" bit to prevent splitting. On a vinyl or aluminum soffit, use self-drilling screws so you don't have to pre-punch a pilot hole from a ladder.
Use the slot spacing as your screw cadence — one screw every 12 to 16 inches is plenty. The strip should sit flat against the soffit with no gap behind it. If the soffit bows or dips, add an extra screw at that point and pull the strip flush before driving home.
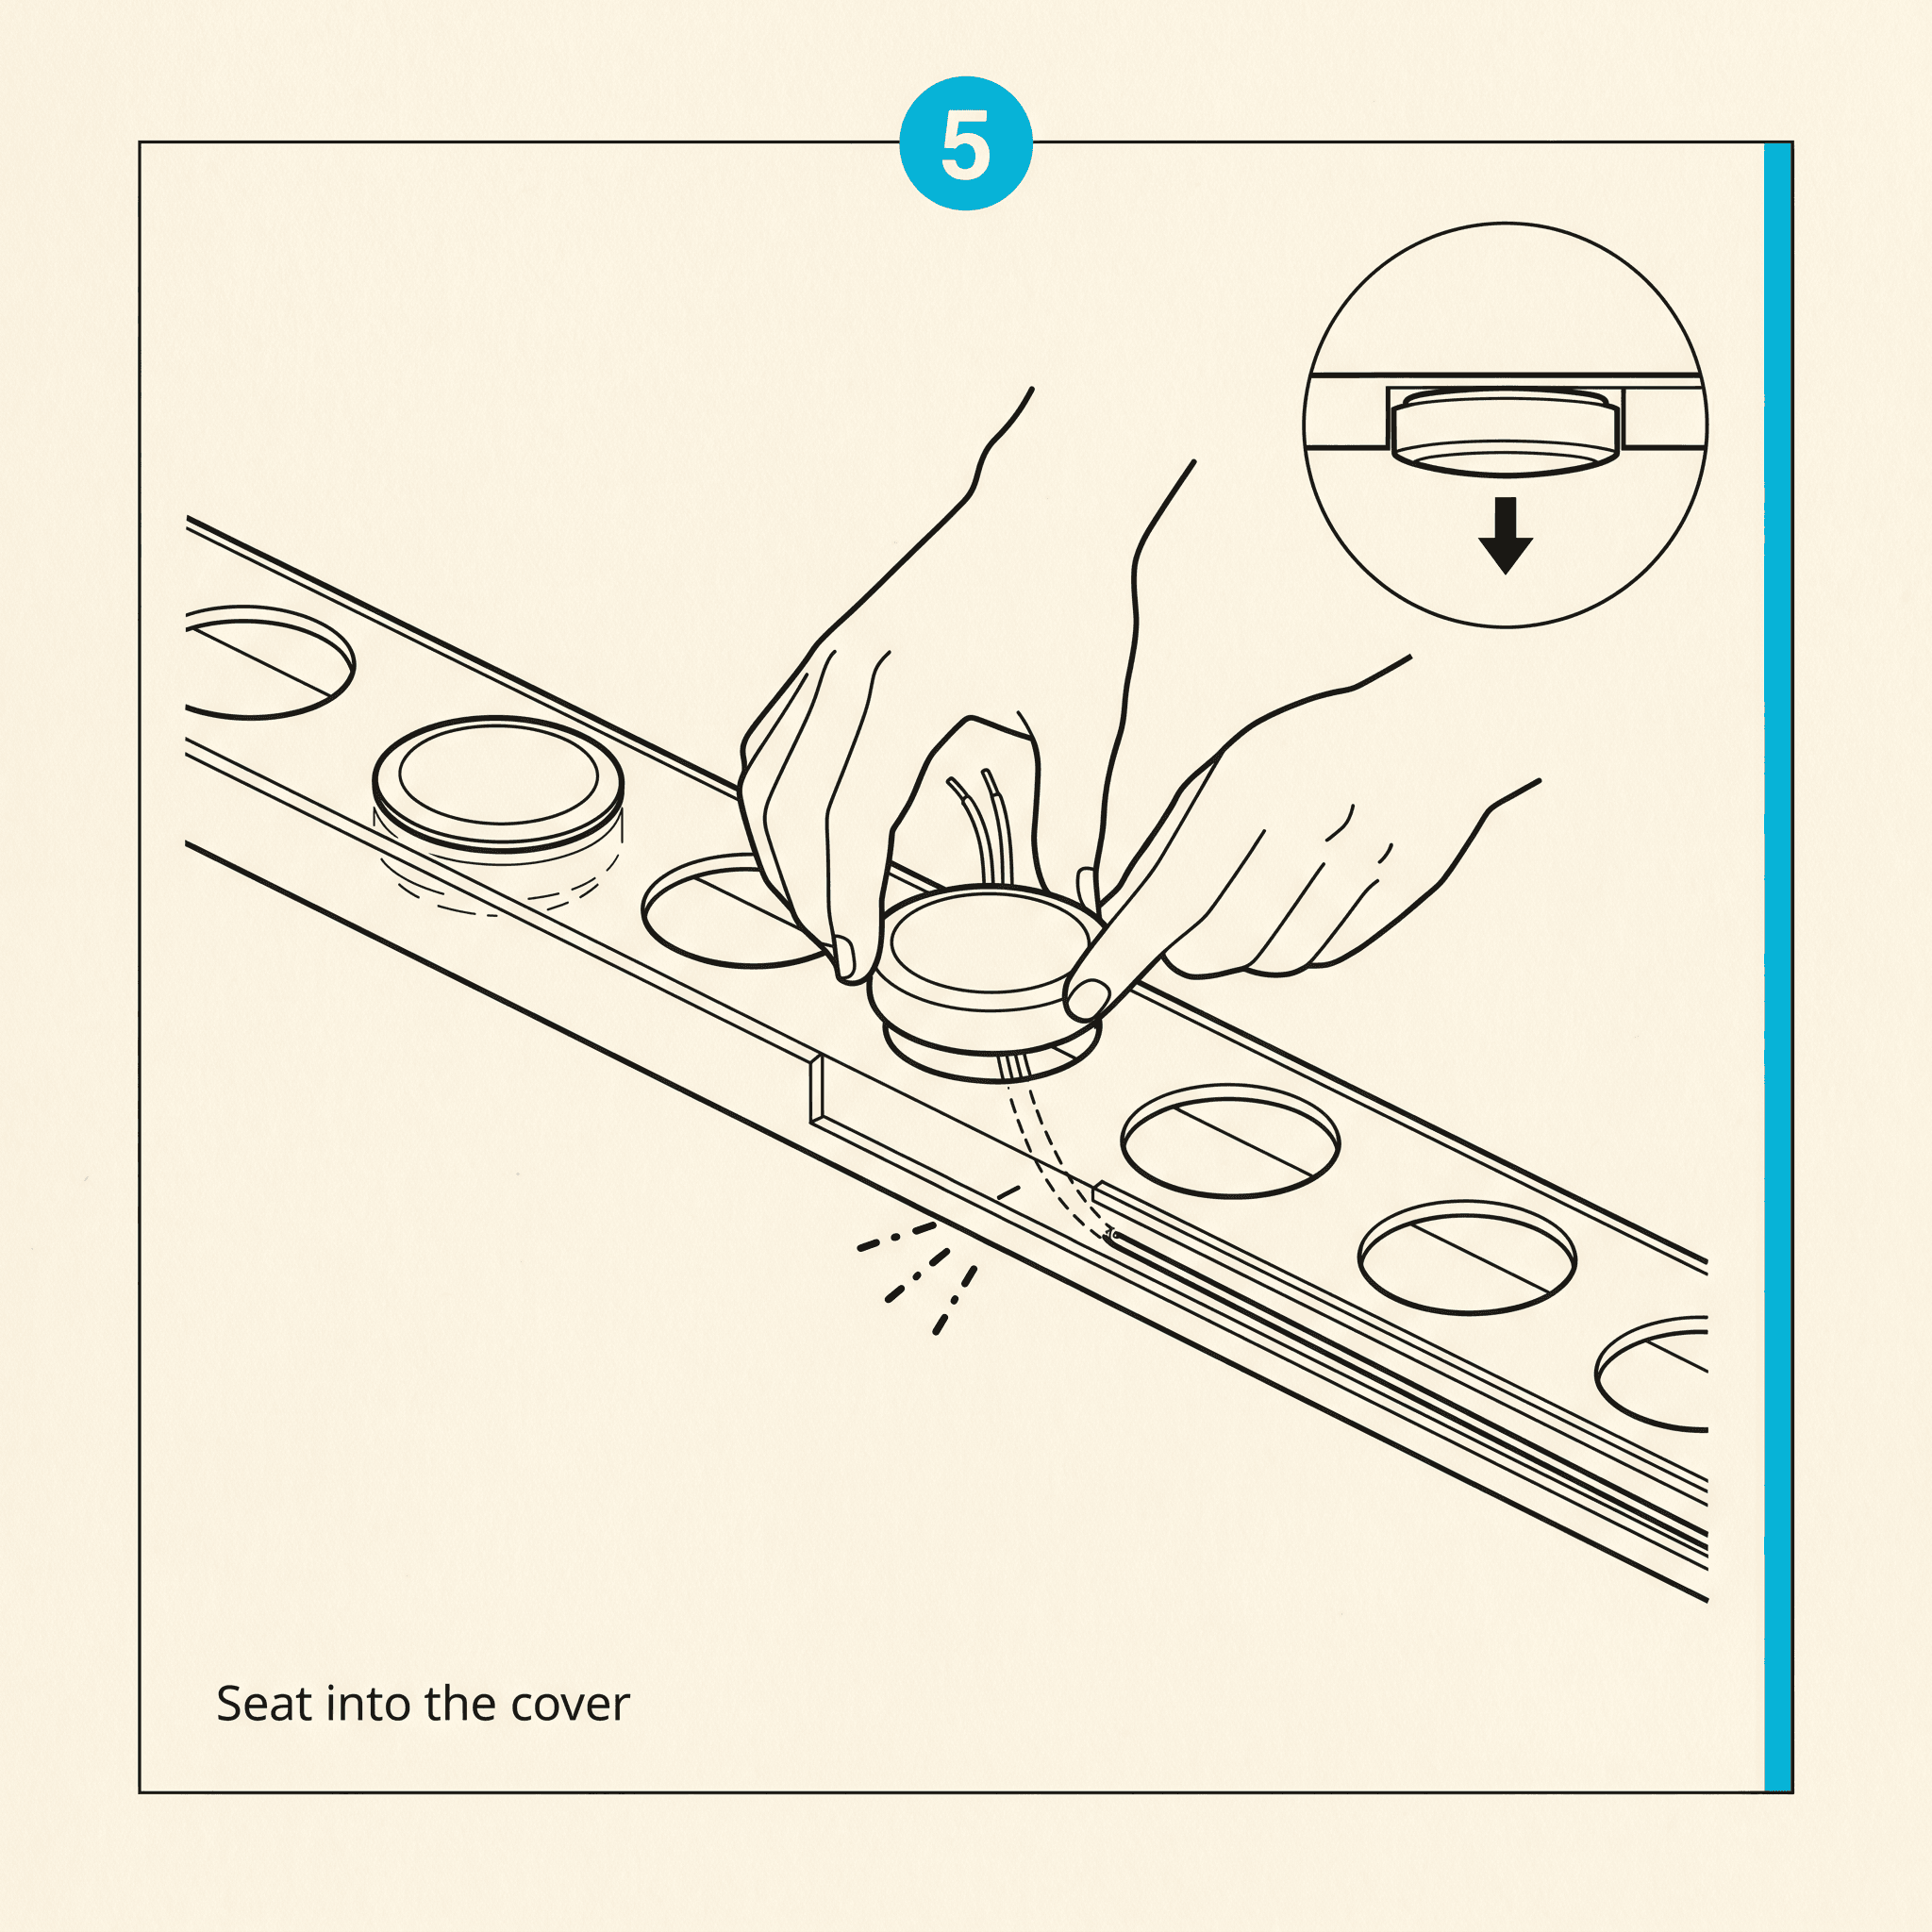
Step 4: Seat pucks into the PETG cover
Govee Permanent Outdoor Pro pucks do not install into the base strip. They press into the PETG cover — the long extruded top piece that has a row of pre-cut circular cutouts running along its length. Lay a cover section on a workbench, cutouts facing up. Take a Govee puck and press it down into a cutout so the lens points down through the cover. The puck seats flush in the cutout; the wire leads pop out the back and route through the wire channel that runs above the cutouts inside the cover.
Maintain Govee's recommended puck spacing — typically every 12" for high-density coverage, or every 18" for perimeter coverage; the cover's pre-cut cutouts are spaced for this. Connect the wire between pucks as you go inside the cover's wire channel. The Govee Pro connector system is polarity-keyed — connectors only go in one way, so it's hard to wire backwards.
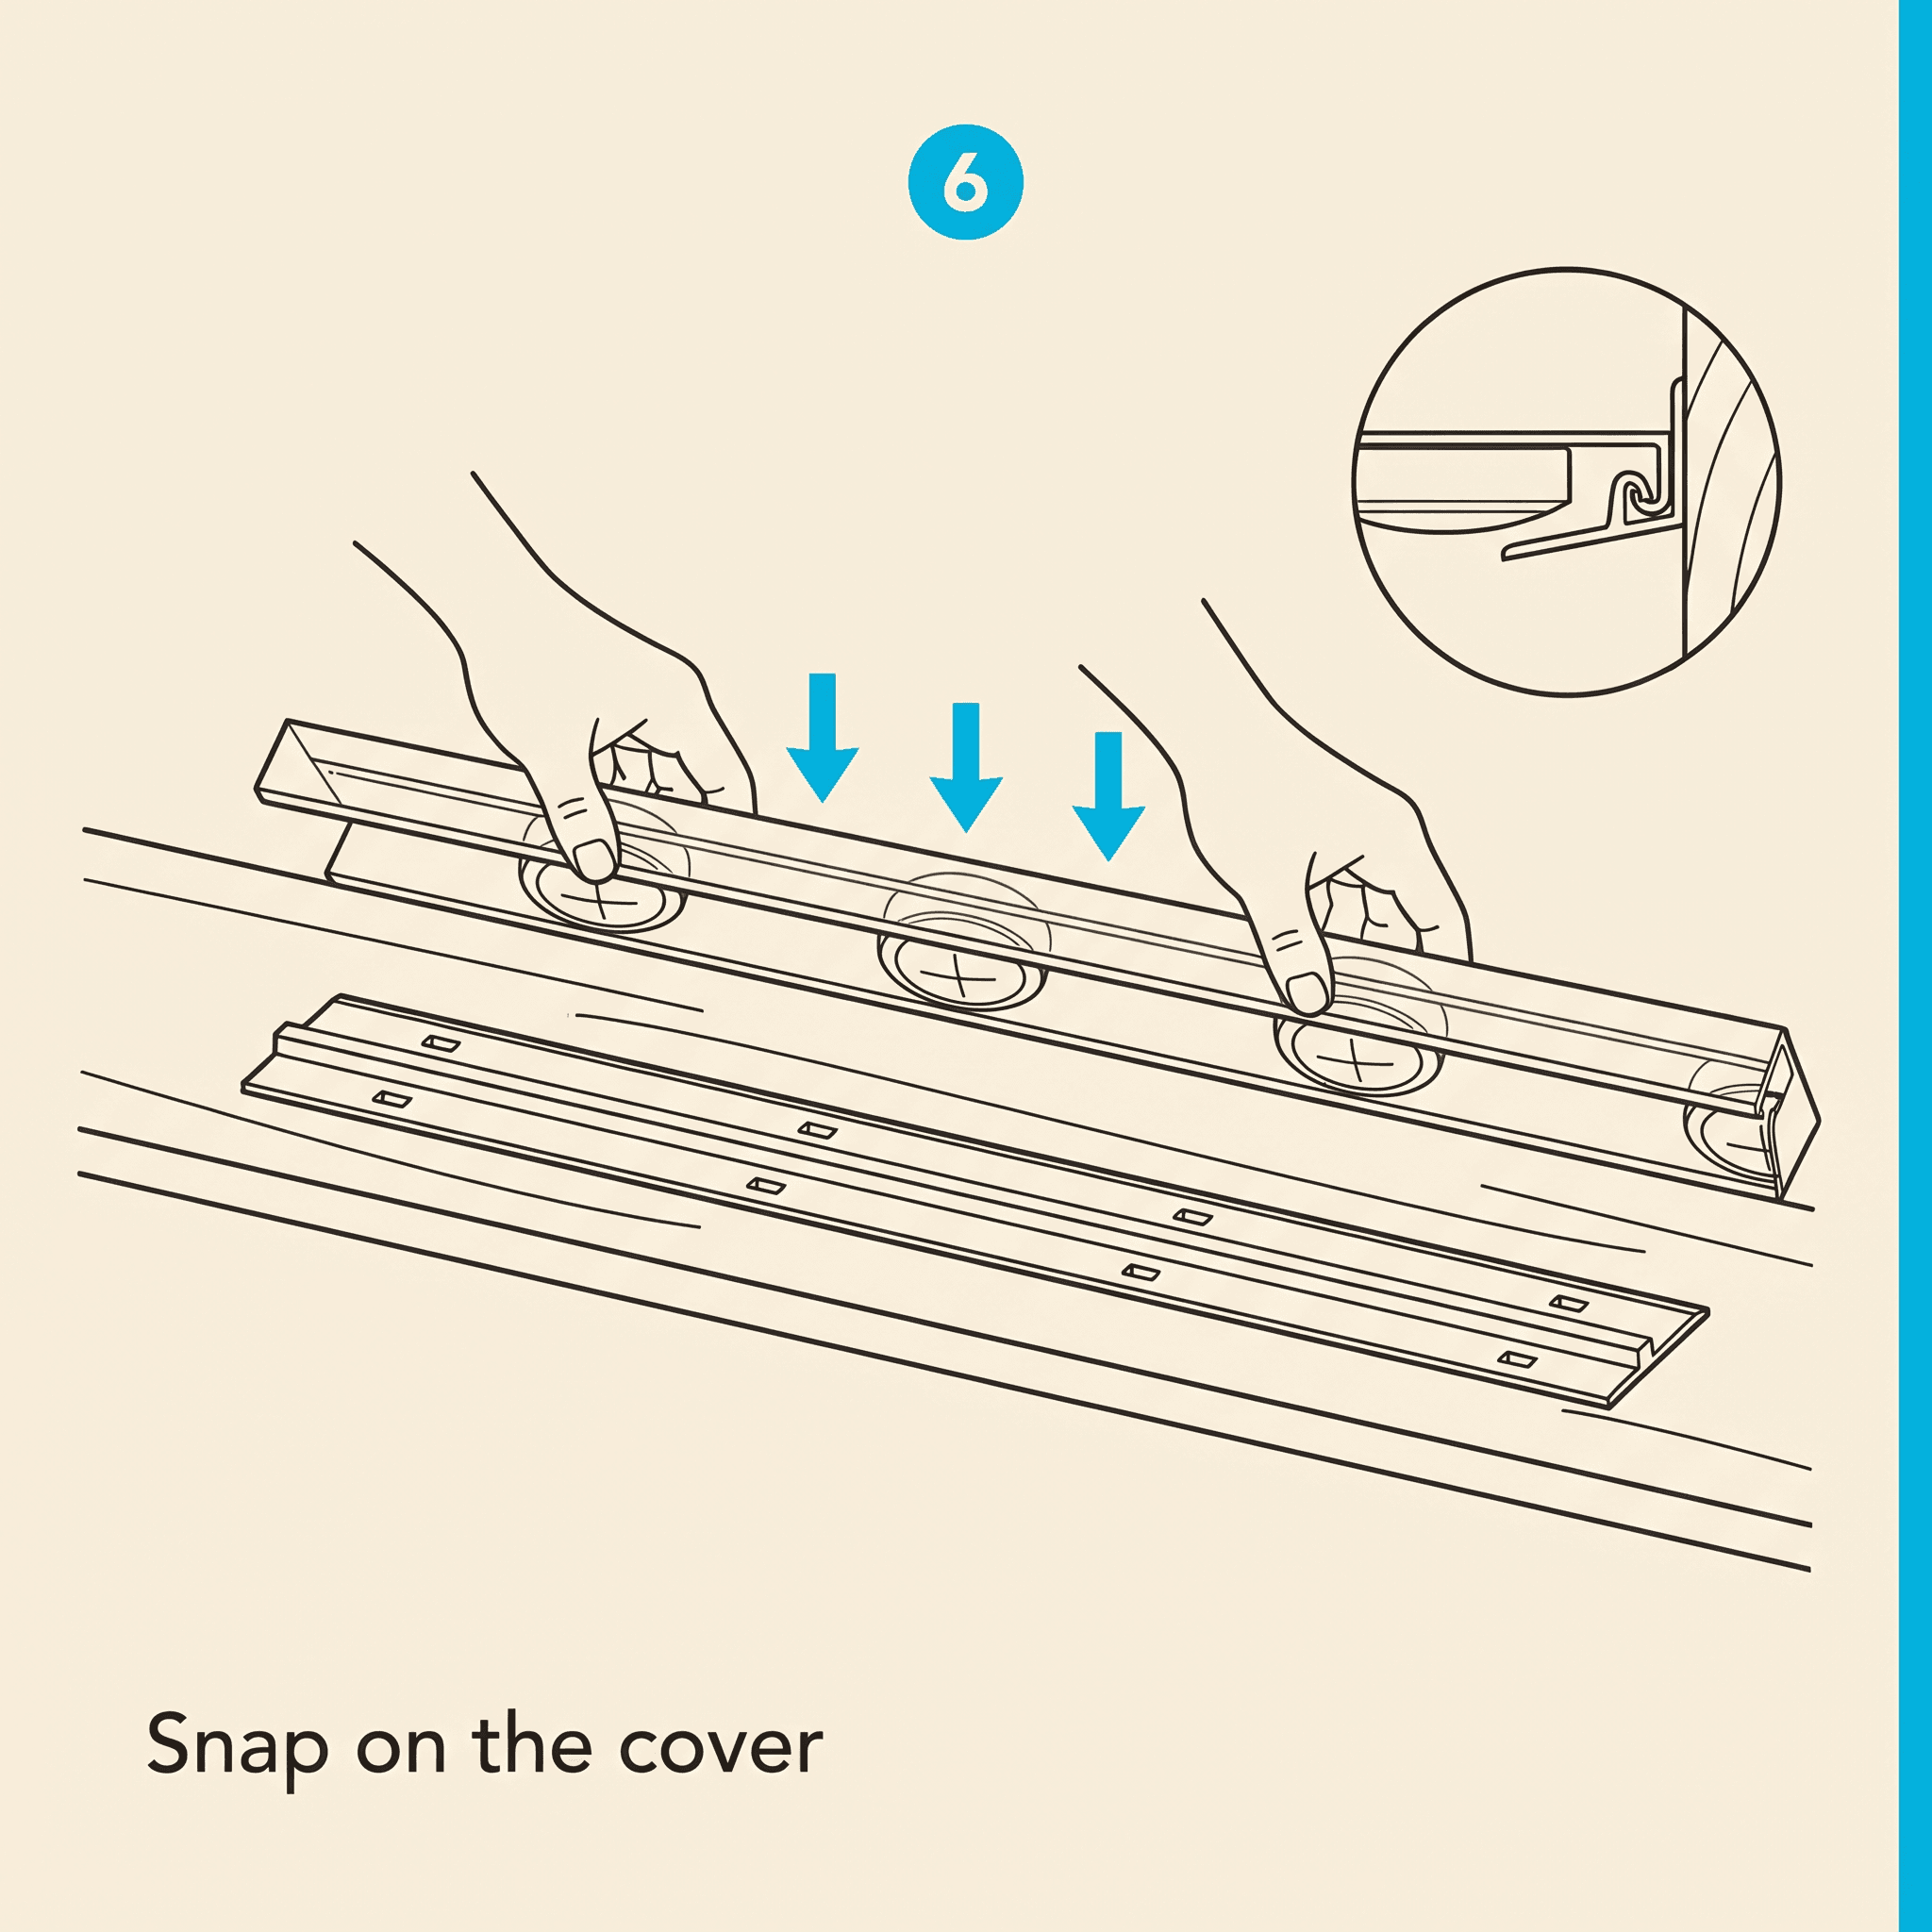
Step 5: Snap the cover onto the base
With pucks seated and the wire daisy-chained inside the cover, press the loaded PETG cover straight down onto the Screen Tight base. The cover wraps over the centered ridge of the base strip and locks in place. Start at one end and walk down the length, pressing every few inches until the cover is fully seated along the run. The cover hides every wire and gives the installation its finished, low-profile look.
Cut cover sections to length with a miter saw. The PETG cover can be painted with standard exterior latex paint to match your trim color exactly — lightly scuff it first and use a paint rated for plastics.
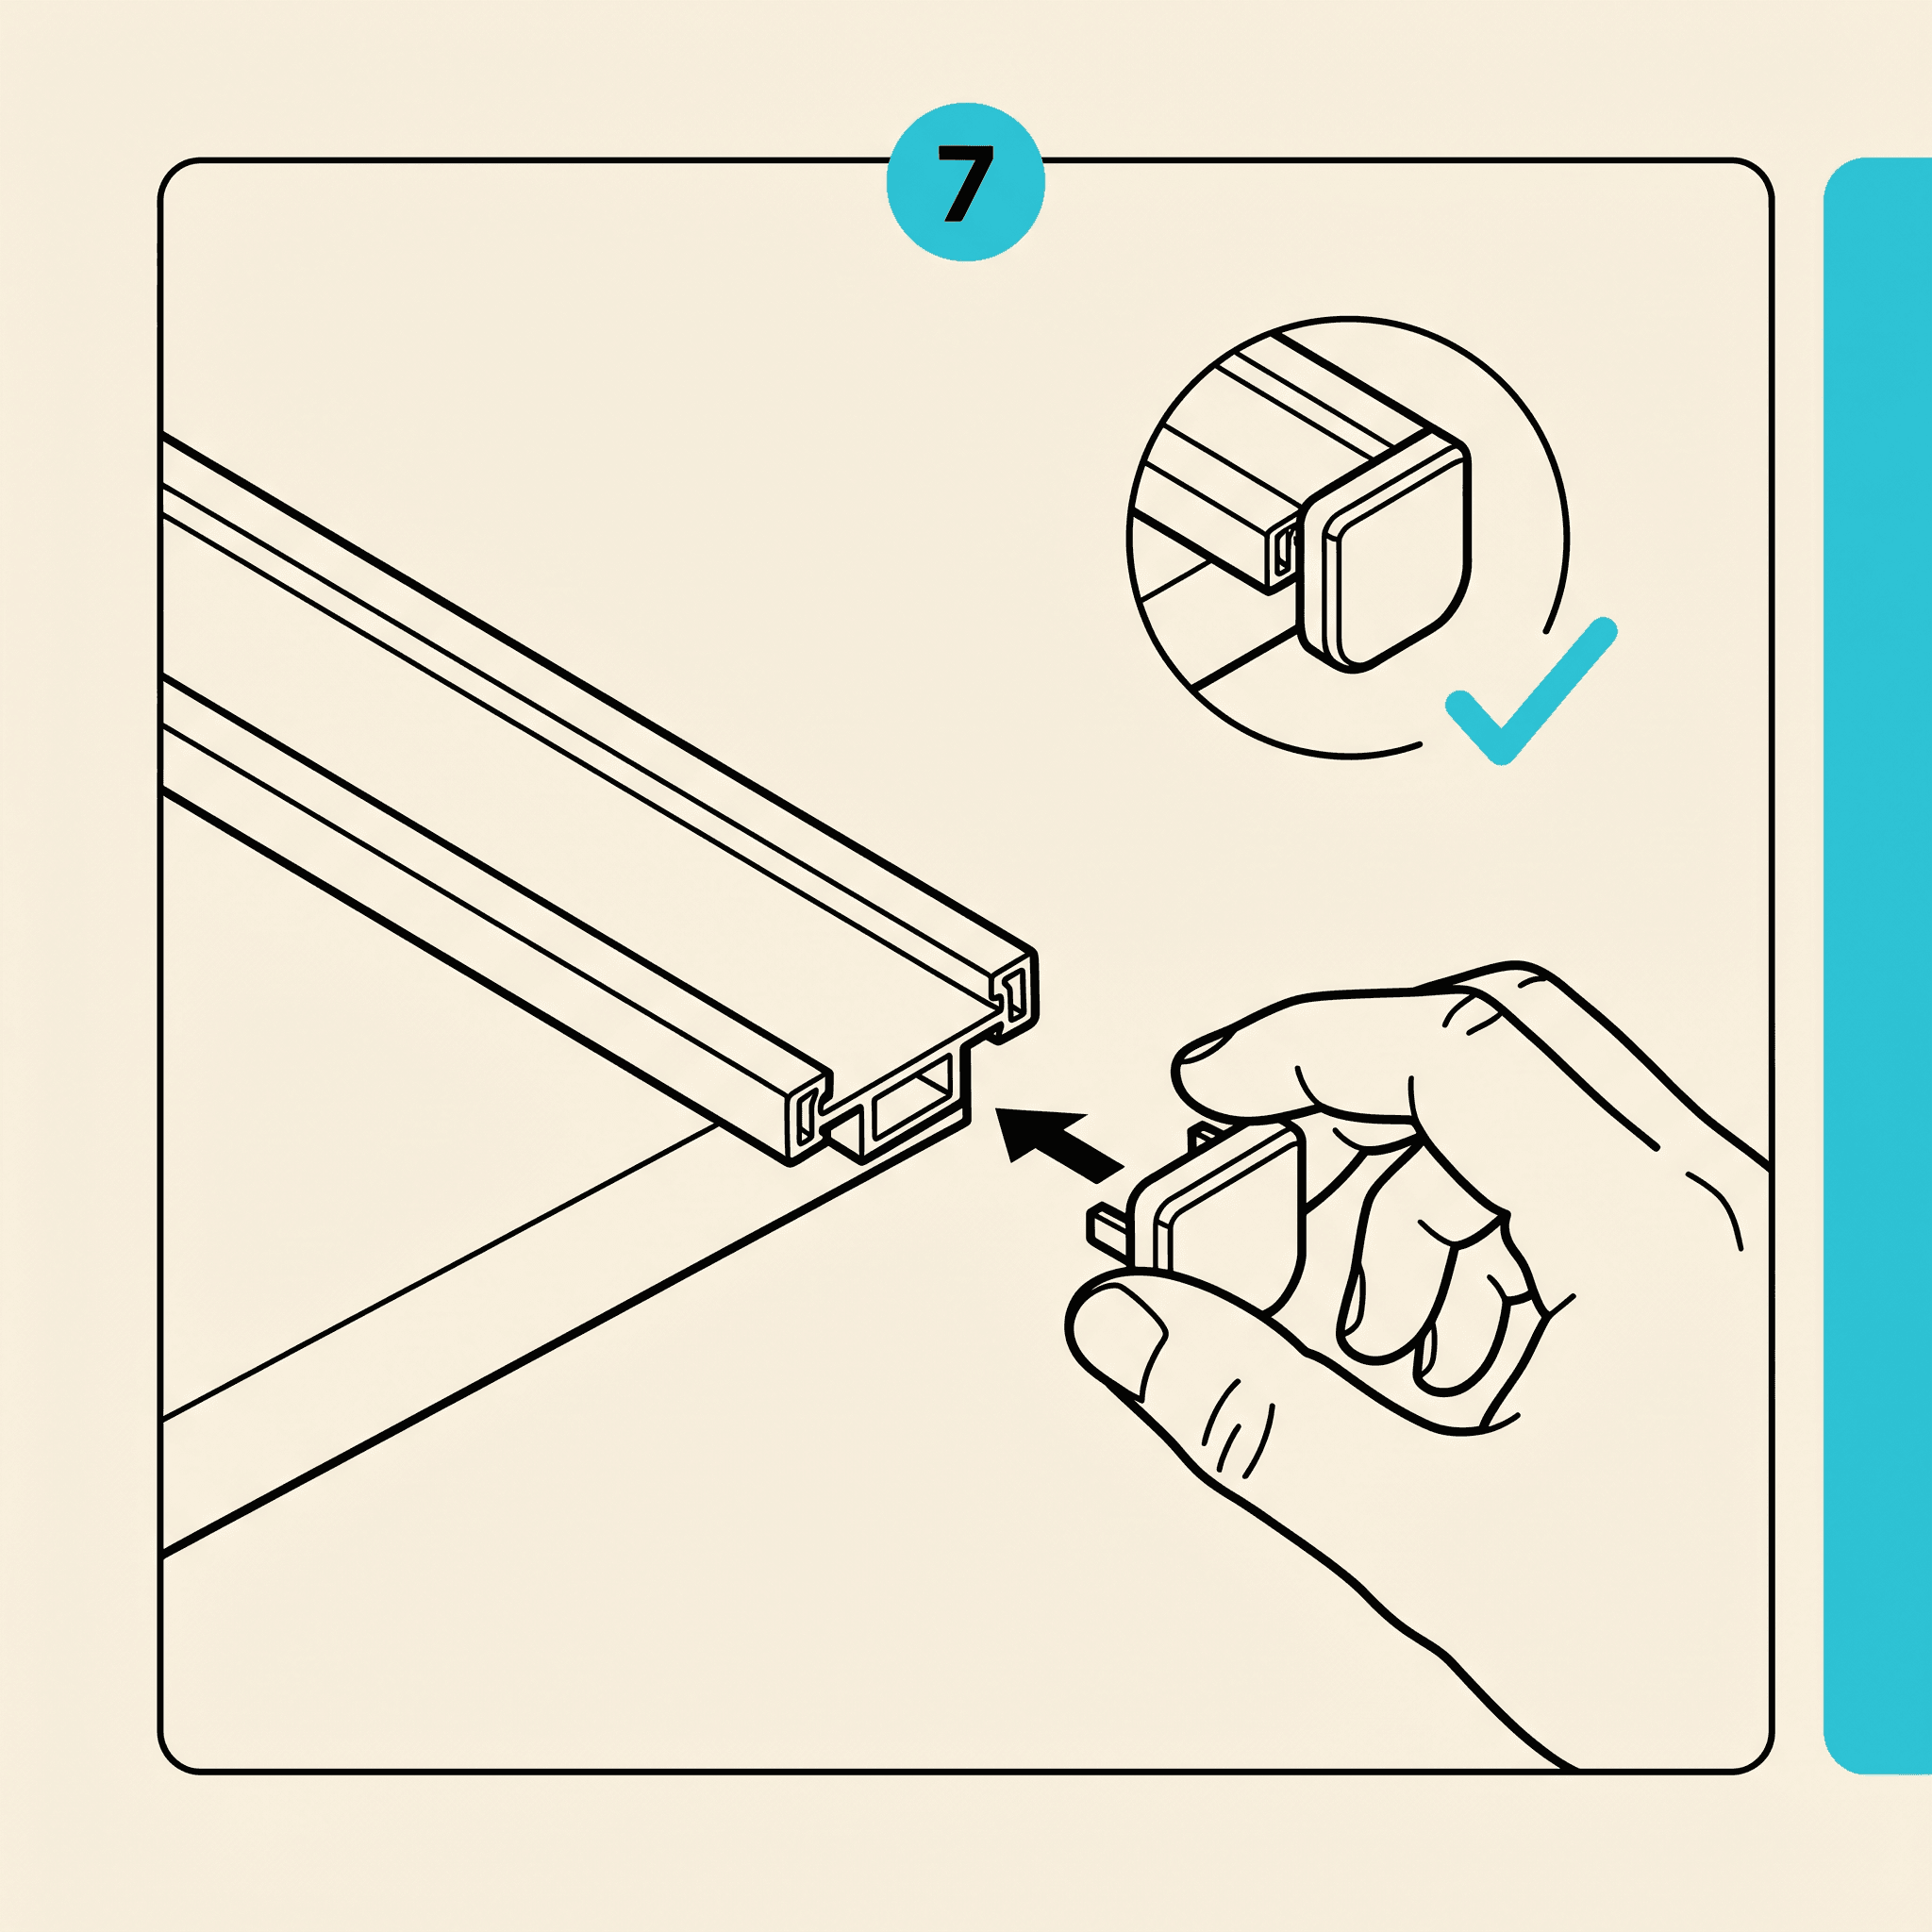
Step 6: Cap the open ends
Press a finishing end cap onto every open run. End caps close the channel and keep moisture and debris out. Once an end cap is seated, the run is ready for power.
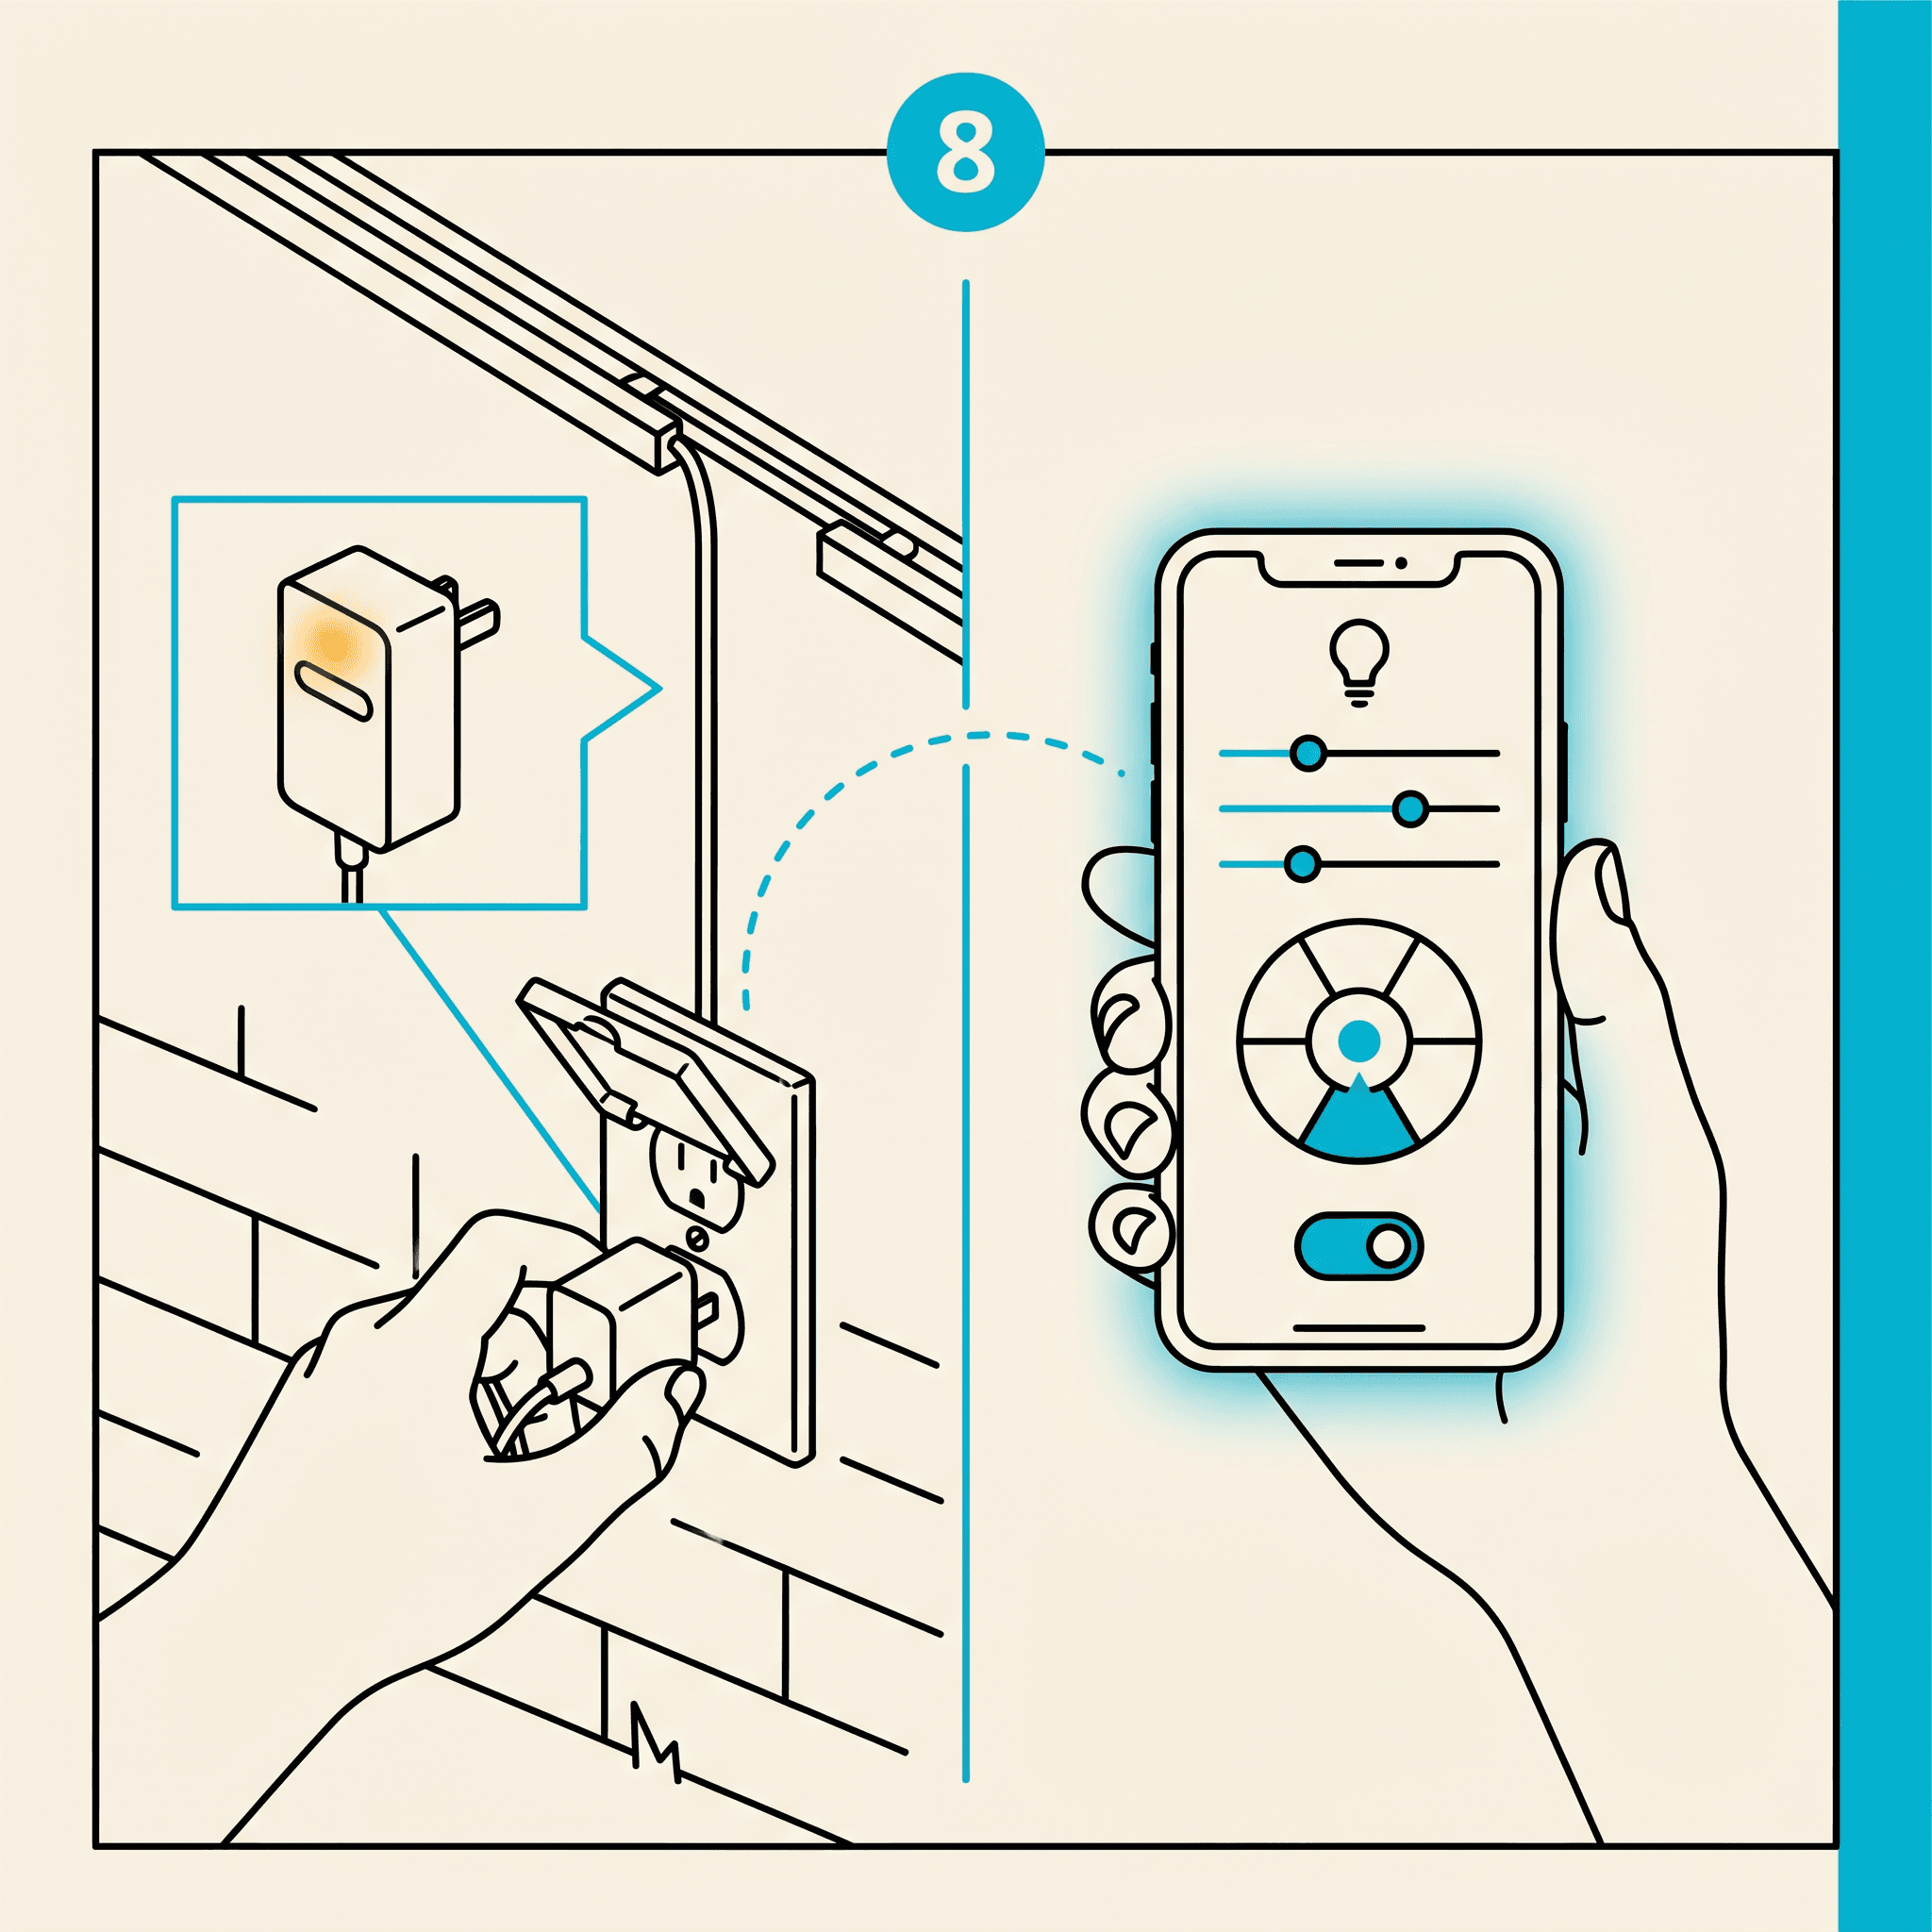
Step 7: Plug in and pair the Govee app
With all pucks seated and wires routed, connect your leads to the Govee power supply (sold separately by Govee, included in the Govee Permanent Outdoor Pro purchase). The power supply should be mounted in a sheltered location — under a soffit, in a weatherproof box, or inside a garage near an exterior wall penetration. Connect the Govee supply to a GFCI outlet; never use a non-GFCI outlet for outdoor low-voltage lighting.
Pair the controller with the Govee Home app (available on iOS and Android). Pairing is a Govee process — if you have trouble, follow Govee's troubleshooting steps; it's typically a matter of pressing and holding the controller's power button to enter pairing mode and connecting through a 2.4 GHz Wi-Fi network (not 5 GHz).
Run a full-color sequence along each run before you button everything up. Walk the roofline from the ground and look for pucks that didn't seat fully (they'll be dim or off), wire connectors that didn't click, and any sections where the cover track is lifting.
Step 8: Walk it from the ground
Once everything checks out from the ladder, walk the roofline from the street and confirm the track barely shows during the day. Tidy up the wire runs, seal any wall penetrations with silicone, and zip-tie any excess wire neatly against the power-supply housing.
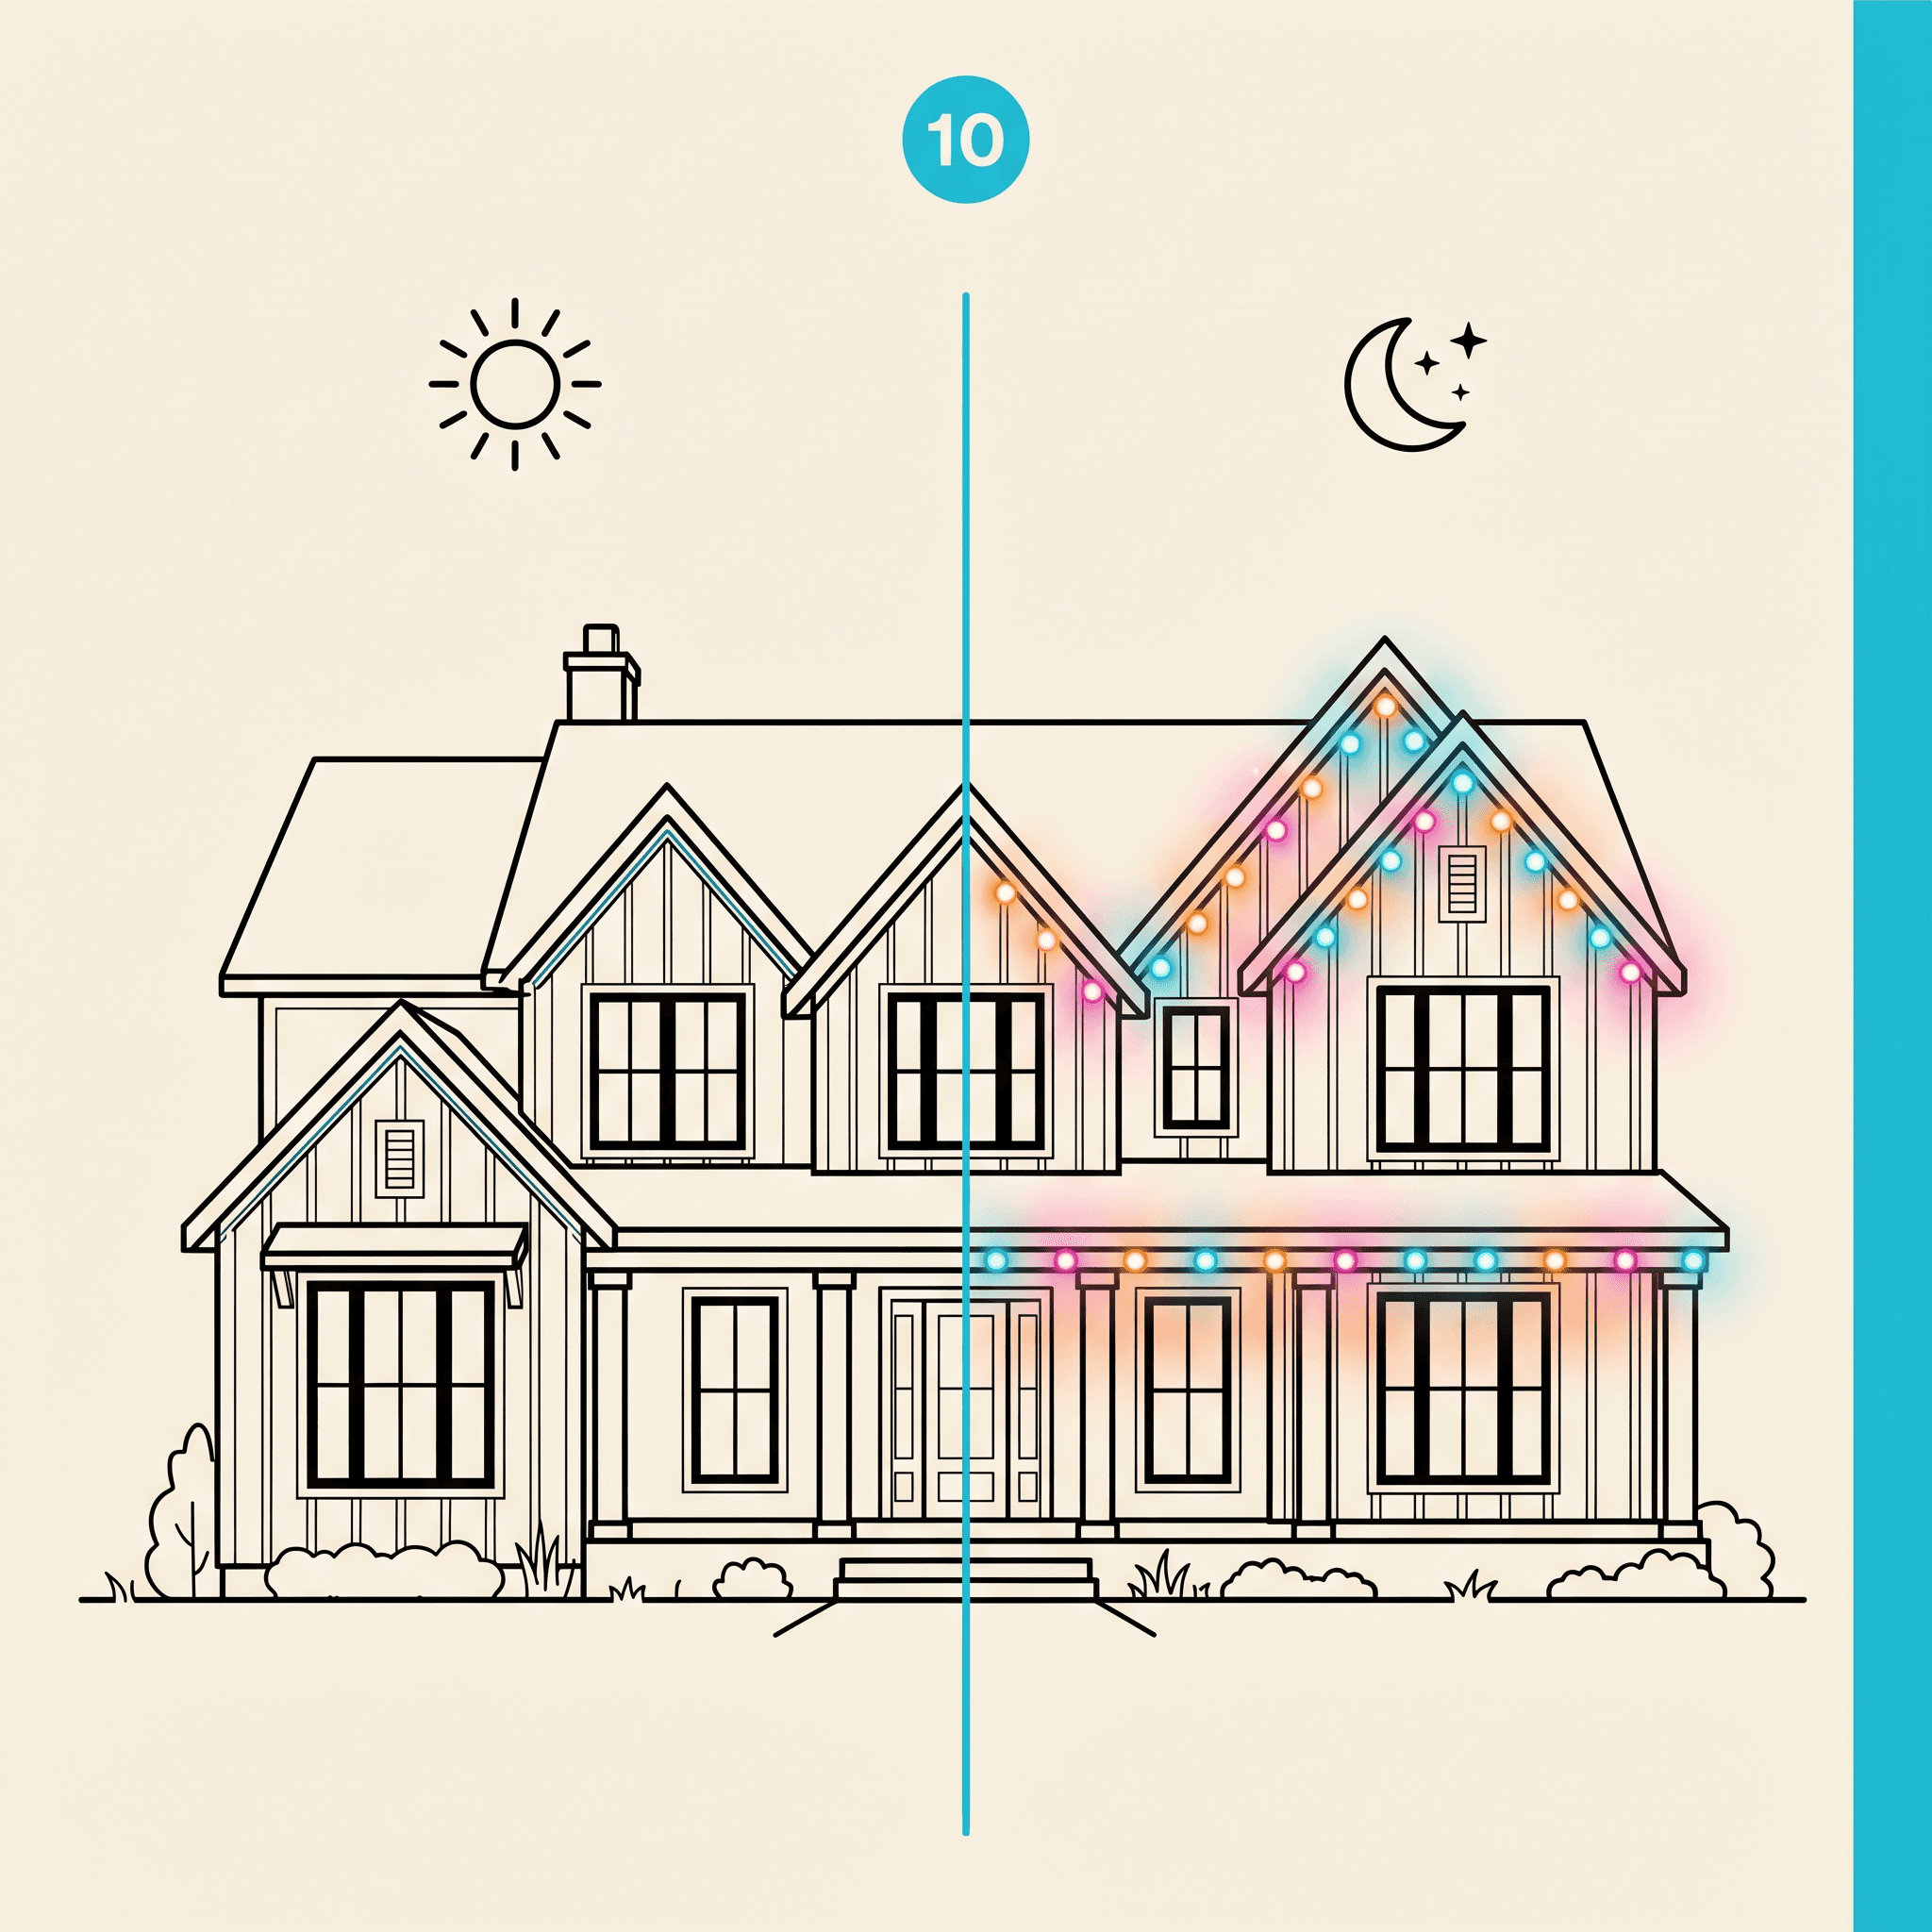
Step 9: Schedule the show
Once everything checks out, tidy up the wire runs, seal any wall penetrations with silicone, and zip-tie any excess wire neatly against the power-supp Set your Govee app schedule for automatic sunrise/sunset operation and you're done. The whole install — for a typical 100-foot single-story home — should take two days. Saturday for measuring, marking, and mounting the base; Sunday for seating pucks into the covers, snapping covers onto the base, and connecting power. No contractor. No quotes. No ladders on your driveway for three weeks.
Troubleshooting
Puck won't seat in the cover
Confirm the puck is oriented lens-down and the cover's cutout matches the puck diameter. The PETG cutout is sized for a snug fit — if you're forcing it, double-check you're seating from the inside (top) face of the cover, not the outside.
Puck doesn't light up
First check: is the connector fully seated? Govee Pro connectors need a firm push to click fully. Second check: is the previous puck in the chain working? The system is daisy-chained — a failed connector mid-run can knock out everything downstream.
Track won't lay flat
A bowed or dipped soffit is the usual culprit. Add a screw at the high or low point and pull the track flat before driving it home. If the soffit is significantly rotted, warped, or sagging, repair or replace that section before mounting track — the track won't solve an underlying structural problem.
Cover pops off the base
The cover locks over the centered ridge of the Screen Tight base. If a section keeps lifting, check that the base strip is screwed down flat with no bow, and that no wire is bulging up out of the cover's internal wire channel. A wire looped over the engagement edge will prevent the cover from seating fully.
App won't connect to lights
This is a Govee pairing issue, not a track issue. Follow Govee's pairing instructions — the lights need to be in pairing mode (usually by pressing and holding the power button on the controller). Ensure you're connecting from a 2.4 GHz Wi-Fi network, not 5 GHz.
GeauxTrax sells the PETG track system only. Govee®, Permanent Outdoor Pro®, the Govee Home app, and all related electronics are products of Shenzhen Intellirocks Tech. Co., Ltd. and are sold separately by Govee. GeauxTrax is not affiliated with, endorsed by, or sponsored by Govee.